NEWSnews
How to Read a Resistance Tester

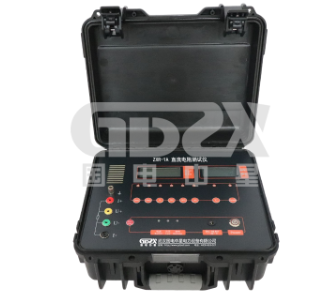
1. The instrument is equipped with one pair (two sets) of measuring wires. The thick measuring wire in the red wire group is connected to the red current terminal of the tester, and the thin measuring wire in the red wire group is connected to the red resistance detection terminal; The thick measuring wire of the black wire group is connected to the black current terminal, and the thin measuring wire of the black group is connected to the black resistance detection terminal of the tester.
2. Connect the power, turn on the power switch, and the digital display screen will light up.
3. Select the testing range of 200 mQ or 600 mQ as needed. When the switch pops up to a 200 mQ range, the displayed resistance measurement range is 15-200 mQ; When the switch is pressed to the 600 mQ range, the displayed resistance measurement range is 200-600 mQ.
4. Turn the current adjustment knob counterclockwise to the zero position.
5. Manual measurement
1) Set the "timer" switch to the off state;
2) After checking that steps (3) - (4) are correct, set the preset/test switch to the preset state, adjust the alarm resistance to adjust the potentiometer,
Pre set alarm resistance value;
3) Connect the test clamps to the test points of the tested object separately;
4) Press the start button, the test light will turn on, adjust the current adjustment knob to the desired current value, and then read the displayed resistance reading. When the resistance in the grounding area of the measured object is greater than the set grounding resistance alarm value, the instrument will emit intermittent sound and light alarms. Otherwise, no alarm will be triggered. If the test needs to be stopped, press the reset button, the test light will turn off, and the circuit current can be cut off. Remove the test clamp from the tested object for the next measurement.
7. Timed measurement (note: This instrument can only be turned on for timed measurement when the instrument is in the testing state, and cannot be timed in the preset state)
1) Set the instrument to a reset state;
2) Connect the power, turn on the power switch, and the digital display screen will light up.
3) After checking that steps (3) - (4) are correct, set the preset/test switch to the preset state, adjust the alarm resistance to adjust the potentiometer, and preset the alarm resistance value;
4) Set the preset/test switch to the testing state; Connect the test clamps to the test points of the tested object separately;
5) Press the timer switch, adjust the timer value, set the required test time, then press the start button, the test light will light up, adjust
Adjust the current adjustment knob to the desired current value, then read the displayed resistance reading. When the resistance in the grounding area of the measured object is greater than the set grounding resistance alarm value, the instrument will emit intermittent sound and light alarms. Otherwise, no alarm will be triggered. At the end of the testing time, the circuit current will be automatically cut off. Remove the test clamp from the tested object for the next measurement.
8. The instrument has an open circuit alarm selection function. Press the open circuit alarm switch and the start button. If the grounding circuit is open or the test clamp is not properly clamped with the measured object, the instrument will emit an audible and visual alarm.
9. The instrument has an overcurrent protection function. When the circuit current exceeds 32A, the instrument emits an overcurrent sound and light alarm, the overcurrent light remains on, the buzzer continues to sound, and the circuit current is automatically cut off. Press the reset button to cancel the alarm state, and turn the current adjustment knob counterclockwise a little to prepare for the next measurement.
10. When the instrument is in the set state, only the upper limit of resistance can be set, and other operations such as timing and current cannot be performed
Adjust.
11. When the instrument is in the testing state, the preset resistance cannot be set
GDZX is a manufacturer of power testing equipment, producing a wide range of products with complete models and providing professional technical support. The phone number is 4000-828-027.


